
Lately, in our Big Data course at University, we were required to install Hadoop and made a report about the installation progress. Having completed it, I thought I should share my experience.
Introduction
If you are into Big data, you must have already heard about Hadoop.
Apache Hadoop is an open source framework that is used to efficiently store and process large datasets ranging in size from gigabytes to petabytes of data. Instead of using one large computer to store and process the data, Hadoop allows clustering multiple computers to analyze massive datasets in parallel more quickly.
Though as popular as it seems, the installation progress is a bit intimidating for new users. You must have guessed that “Oh, its popular so it must have a straight forward installation progress”, but nope, at least it’s not easy with the manual installation progress.

In this post, I will demonstrate two approaches to install Hadoop. Manual installation and Docker.
The original way
Note (Info)
The distribution installed in this post is Apache Hadoop downloaded from:
https://hadoop.apache.org/releases.html.
Version: v3.2.3 (released on March 28, 2022).
Install Java
Firstly, to install hadoop, we need to install the Java environment for the operating system. Check if java is available on the machine by typing the following command:
java -version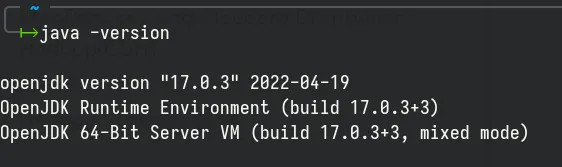
According to the results displayed from the terminal, Java is already installed on my desktop, so we do not have to reinstall Java anymore. Java JDK used is openjdk 17.0.3. If you don’t have Java installed, please head over to ArchWiki for the tutorial.
Install and configure OpenSSH
We need OpenSSH for this installation so let’s install it, shall we? To install OpenSSH on Arch Linux, type the following command into the terminal:
sudo pacman -S openssh
Press Y to confirm the installation. Next step, you have to enable systemd service for ssh:
sudo systemctl start sshd.serviceFinally, we need to configure SSH passwordless, type those commands into your terminal:
ssh-keygen -t rsa -P '' -f ~/.ssh/id_rsacat ~/.ssh/id_rsa.pub >> ~/.ssh/authorized_keyschmod 0600 ~/.ssh/authorized_keysIf ssh has been properly set up, you should get the following output:
Generating public/private rsa key pair.Your identification has been saved in /home/ashpex/.ssh/id_rsaYour public key has been saved in /home/ashpex/.ssh/id_rsa.pubThe key fingerprint is:SHA256:Ic5SYgbyl1S4gUbsEoi3pgLu/fA3FHkLmUNFXJLjaU ashpex@archlinuxThe key's randomart image is:+---[RSA 3072]----+|..=o=+. +.o=.|| oS=S= o *.o.|| .. Xo+ o = E || +.* = . = || . + S o . || . + . o || . = . || o.o || oo... |+----[SHA256]-----+Warning (Caution)
If you get the error ssh: connect to host localhost port 22: Connection refused it means that openssh is not installed or the ssh service has not been started. Please check the installation process again.
Download and install Hadoop
Download the installation package
We can go to the Apache Hadoop home page to select and download the installation file.
Or use wget to download the package directly:
wget https://archive.apache.org/dist/hadoop/common/hadoop-3.2.3/hadoop-3.2.3.tar.gz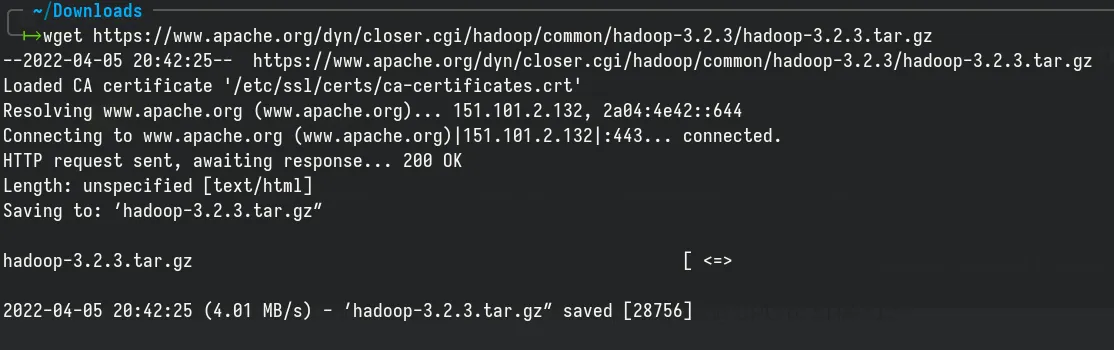
Check the downloaded archive:
![]()
After downloading the installation package to your computer, to make sure the package is safe, you can check the signature of the file with PGP or check the checksum SHA-512 by typing the following command (at the directory path containing the downloaded file):
shasum -a 512 hadoop-3.2.3.tar.gz
Compare the results with the Apache Hadoop checksum file over here: https://downloads.apache.org/hadoop/common/hadoop-3.2.3/hadoop-3.2.3.tar.gz.sha512
Extract the archive:
Type the following command to extract the installation file:
tar xzf hadoop-3.2.3.tar.gzAfter extracting, we will get the following files (in the directory hadoop-3.2.3)
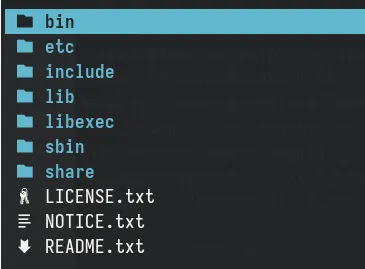
To make it easier to work for later steps in this tutorial, we will rename the folder hadoop-3.2-3 (after extracting) to hadoop. Now the hadoop directory will be located at ~/Downloads/hadoop.
mv hadoop-3.2.3 hadoopConfigure environment variables:
Warning (Caution)
This is the most important step, failure in following these instructions may lead to incorrect hadoop installation.
Next, we need to set the environment variable by editing the file .zshrc (depending on the shell in use, you may need to edit other file, in most cases we usually edit the .bashrc file. as this is the default shell in most Linux distributions):
Edit the file .zshrc at ~/.zhrc by typing the command:
vim ~/.zshrcAdd the following environment variables:
export JAVA_HOME='/usr/lib/jvm/java-17-openjdk'export PATH=$JAVA_HOME/bin:$PATHexport HADOOP_HOME=~/Downloads/hadoopexport PATH=$PATH:$HADOOP_HOME/binexport HADOOP_CONF_DIR=$HADOOP_HOME/etc/hadoop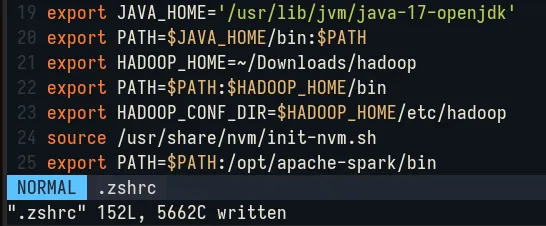
After editing the .zshrc file, we need to run the following command to update the shell:
source ~/.zshrcNext, we need to add the Java environment variable to the file hadoop-env.sh at the path ~/Downloads/hadoop/etc/hadoop/hadoop-env.sh:
Use a text editor (vim) to edit the file:
vim ~/Downloads/hadoop/etc/hadoop/hadoop-env.shAdd the following Java environment variable:
export JAVA_HOME='/usr/lib/jvm/java-17-openjdk'Similarly, edit the file /etc/hadoop/core-site.xml to add the following lines:
<configuration> <property> <name>fs.defaultFS</name> <value>hdfs://localhost:9000</value> </property></configuration>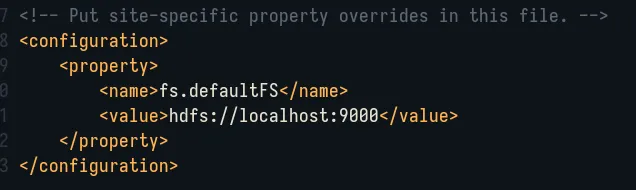
Next step, edit etc/hadoop/hdfs-site.xml to add the following lines:
<configuration> <property> <name>dfs.replication</name> <value>1</value> </property></configuration>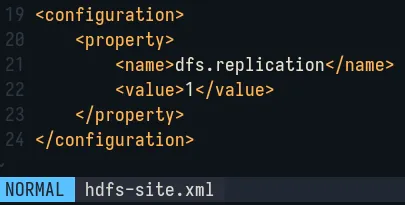
Edit etc/hadoop/mapred-site.xml to add the following lines:
<configuration> <property> <name>mapreduce.framework.name</name> <value>yarn</value> </property> <property> <name>mapreduce.application.classpath</name> <value>$HADOOP_MAPRED_HOME/share/hadoop/mapreduce/*:$HADOOP_MAPRED_HOME/share/hadoop/mapreduce/lib/*</value> </property></configuration>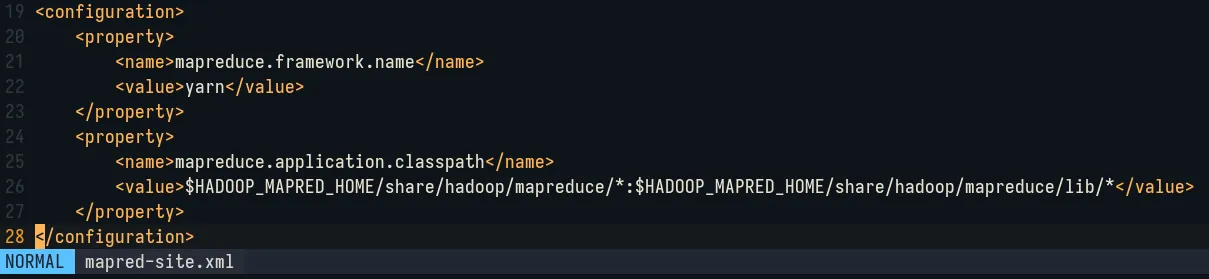
Finally, edit etc/hadoop/yarn-site.xml:
<configuration> <property> <name>yarn.nodemanager.aux-services</name> <value>mapreduce_shuffle</value> </property>
<property> <name>yarn.resourcemanager.hostname</name> <value>127.0.0.1</value> </property>
<property> <name>yarn.nodemanager.env-whitelist</name> <value>JAVA_HOME,HADOOP_COMMON_HOME,HADOOP_HDFS_HOME,HADOOP_CONF_DIR,CLASSPATH_PREPEND_DISTCACHE,HADOOP_YARN_HOME,HADOOP_MAPRED_HOME</value> </property></configuration>
Run Hadoop
Run DFS daemon:
Format HDFS namenode:
hdfs namenode -format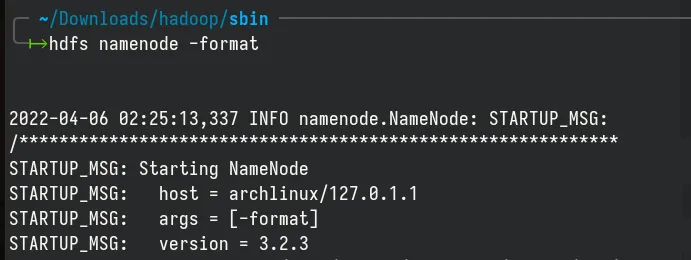
Run the following command to start the NameNode and DataNode daemon:
cd ~/Downloads/hadoop/sbin./start-dfs.sh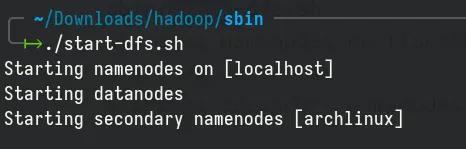
After the NameNode and DataNode are successfully started, we proceed to start the YARN resource manager and nodemanager:
./start-yarn.sh
Check jps:
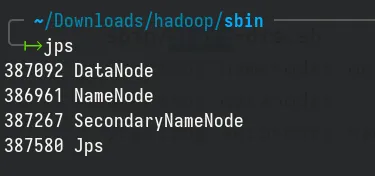
Check the status of jps by typing the command:
jpsWhen the services are started successfully, we will see four processes as shown bellow:
Stop Hadoop
To stop Hadoop services, type the following commands:
cd ~/Downloads/hadoop/sbin./stop-all.sh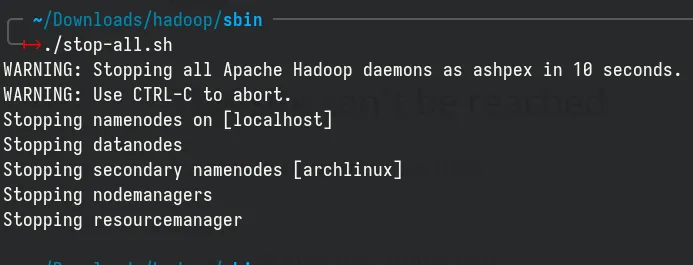
Conclusion
Congratulations! You have successfully install Hadoop in your Linux machine. If you have any questions, feel free to ask in the comment section bellow or contact me directly. Until next time!